|
15 December, '06
It’s been a couple of weeks since the last update, but
it’s been like watching paint dry. Literally. Charlie’s
been all wrapped up in Tyvek overalls, rubber gloves, mask with
special filters for organic solvents and safety glasses and
wielding a brush. He is using an Ados brand epoxy primer, three
coats required. The formulation includes a fungicide which prevents
rot spores getting a hold, and has a very high solids content
when cured so is a very good moisture barrier.
Its an odd product, extremely low viscosity, less than water.
Brushing it is slow work; the wood slurps it up so fast that
the coverage per brushload is very small. It’s penetration
power in the softwoods that most of the boat is built of is
amazing, I tried some on an offcut and it’s going in a
good 5mm then setting off solid. In plywood it goes in to the
first glueline so the entire top veneer of the ply is solidly
impregnated with epoxy.
By the time there are three coats on, there is a glossy surface,
with a light scuff with sandpaper its fine to glue to, and takes
primer paint well.
One issue though is that the vapour is seriously strong, don’t
use it in your basement, do keep all the windows open and wear
all the safety gear.
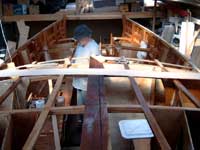
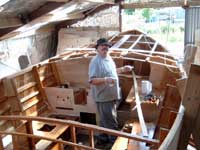
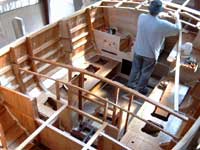
It’s taken a quite a while to get the interior primed,
and while at it Charlie’s primed two sheets of 6mm plywood
with epoxy primer, and this morning we sliced it into 175mm
wide planks ready to begin the job of cold moulding slight compound
curves of the foredeck, pre priming the ply makes painting the
underside much easier when completed.
In the overall picture, the engine bay is close to done, there
are parts coming for the engine systems and the interior is
largely set up with only trims and smaller details such as seat
backrests to do. Electrical wiring will be going in soon, and
we have yet to draw up a wiring diagram.
It's also time to drill the keel bolt holes and we have to
search out a large Forstner bit with which to drill the pockets
for the nuts. The Forstner bit drills a flat bottomed hole and
does not require a pilot hole, and tends not to follow variations
in the grain and can even drill with part of the hole overlapping
other holes or the edge of the piece of wood. Very useful in
building boats with bigger bits of wood in them.
From here, the visual changes begin again, bowsprit bitts and
sampson post, engine, decks, cockpit floor and seats, more work
on the keel. Meanwhile Charlie has a cold. I wonder if the solvents
have got to him a bit, so he’s sitting here in his armchair
in my office hand stitching a sailbag with a big zip down one
side. It’s so he can lower the staysail, fold it while
still on the stay and bag it to protect it from sun and weather.
A useful bag at sea as well, it keeps the sail ready to hoist
while another sail is up on that stay. There will be other covers
to make, one each for the main and the light weather jib, and
possibly one for the topsail. I am sure that when he reads this
he will remind me of the watersail as well.
Systems are going to be high on the list soon, radio, internal
lighting, nav lights, starting and house batteries and such.
We will be working out what’s to go in there, and how
to organise it over the next little while, it’s much easier
to get it all in place before the decks are on.
Note that the systems in this boat will be very simple, and
all systems will have backup so that any breakdowns when far
from home won’t greatly affect the voyage. There will
be kerosene lighting for both interior and navigation lights,
the motor has a handstart. Charlie is going to do some revision
on his use of a sextant so if the GPS is out of action (he will
be carrying two) he can find his way, and even the cooker in
its Sea Swing gimbals will have a little solid fuel backup.
John Welsford,
Designer. |